Aleo Testnet: Guide to Easily Deploy A Node and Wallet

Introduction
Aleo is a privacy-focused layer 1 blockchain, designed from the ground up with the concept of zero-knowledge.
Aleo utilizes a decentralized operating system, snarkOS, for zero-knowledge applications. This code serves as the backbone of the Aleo network, ensuring transaction verification and storing the encrypted state of applications in a publicly verifiable manner.
In total, Aleo has successfully raised $298 million from investors.
Currently, Aleo is in the testnet phase, with the mainnet scheduled for launch in the first quarter of 2024.
1- VPS Configuration
To set up your masternode, you have the choice of hosting it on your own computer or opting for a Virtual Private Server (VPS), which is ideal for hosting websites, applications, or other online services, such as nodes.
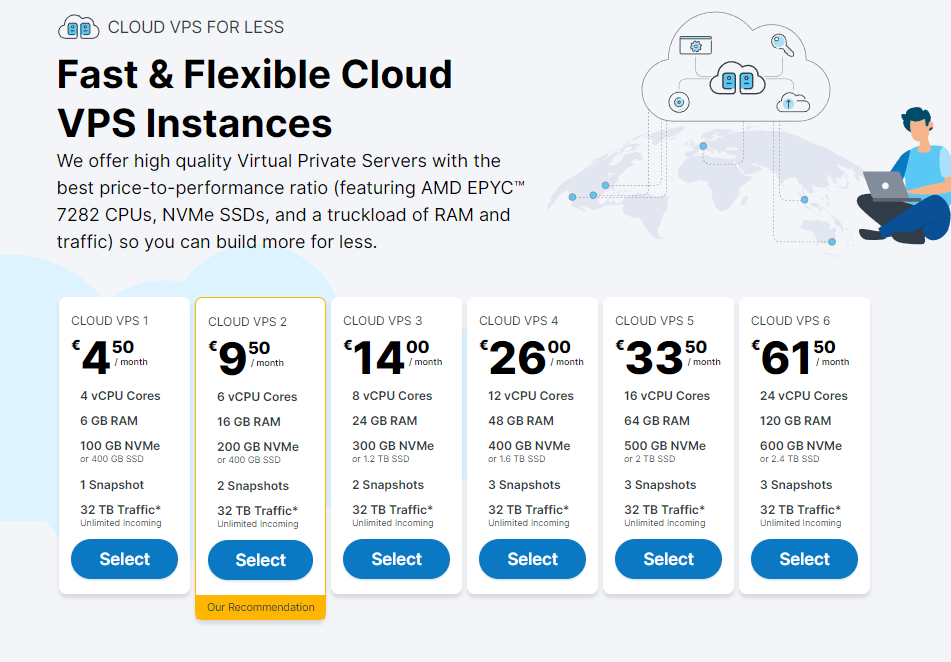
In my case, I opted for Contabo, a reputable VPS rental solution.
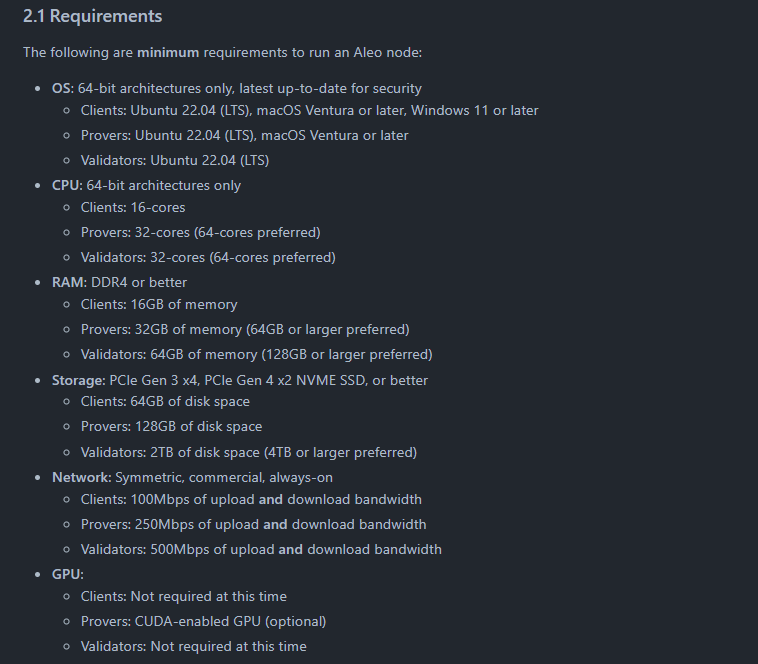
The Aleo Prover node requires an intermediate configuration or higher
I recommend choosing the Cloud VPS 3, or even 4 if it’s within your budget.
Now it’s your turn…
To order your Contabo VPS, you can click on this link.
It’s an affiliate link, with no additional cost to you, which allows me to support my work and provide valuable content.
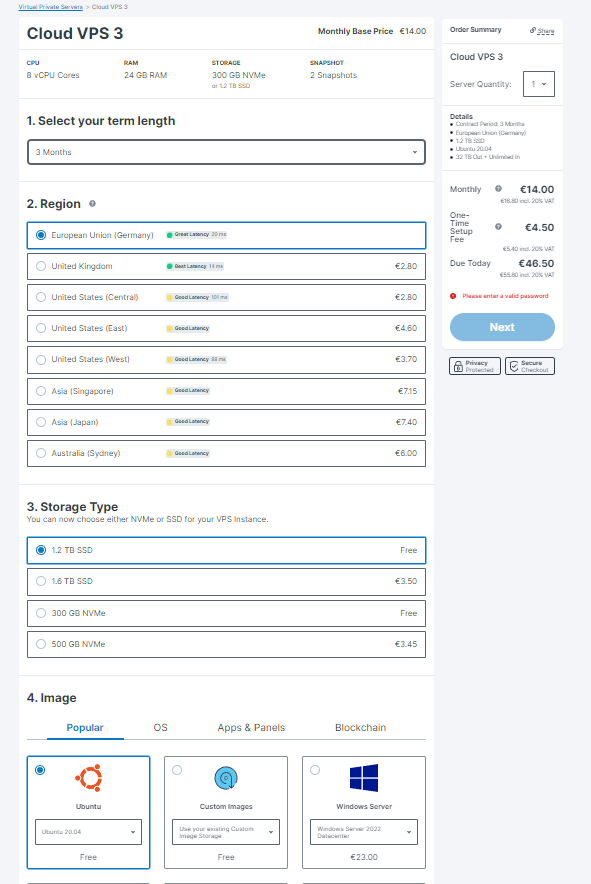
Opt for a 1.2 Tb SSD storage capacity and select the Ubuntu 20.04 image for your configuration.
Once you have completed the payment process, you will receive an order confirmation email. Please wait to receive a second email containing information about your VPS, including your login credentials.
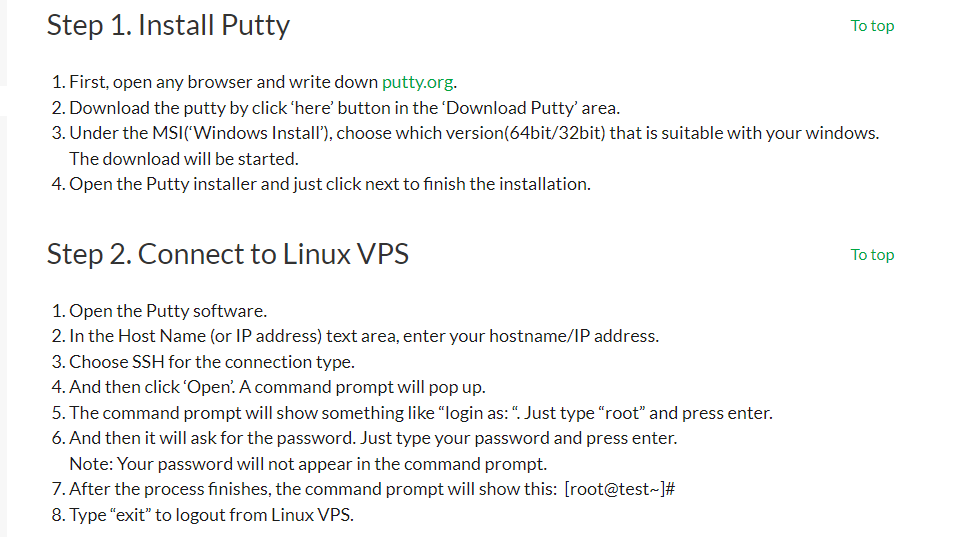
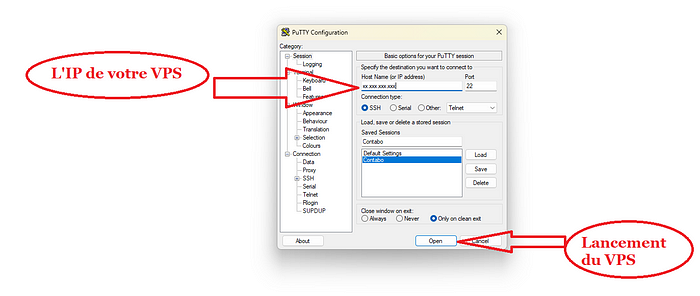
To connect to your VPS, I recommend following this detailed tutorial. You will need to download the Putty software, which will allow you to establish a secure connection with your VPS and access its features.
2- Installation of Essential Components
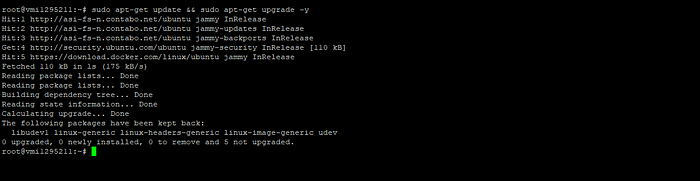
Before diving into the installation of your node, it is crucial to update your VPS. To do this, simply execute the following command in your VPS terminal:
sudo apt-get update && sudo apt-get upgrade -y
Copy the command and right-click in your terminal to paste it.
Install the Screen software:
apt install screen git -y
Download the Rust programming language:
curl --proto '=https' --tlsv1.2 -sSf https://sh.rustup.rs | sh
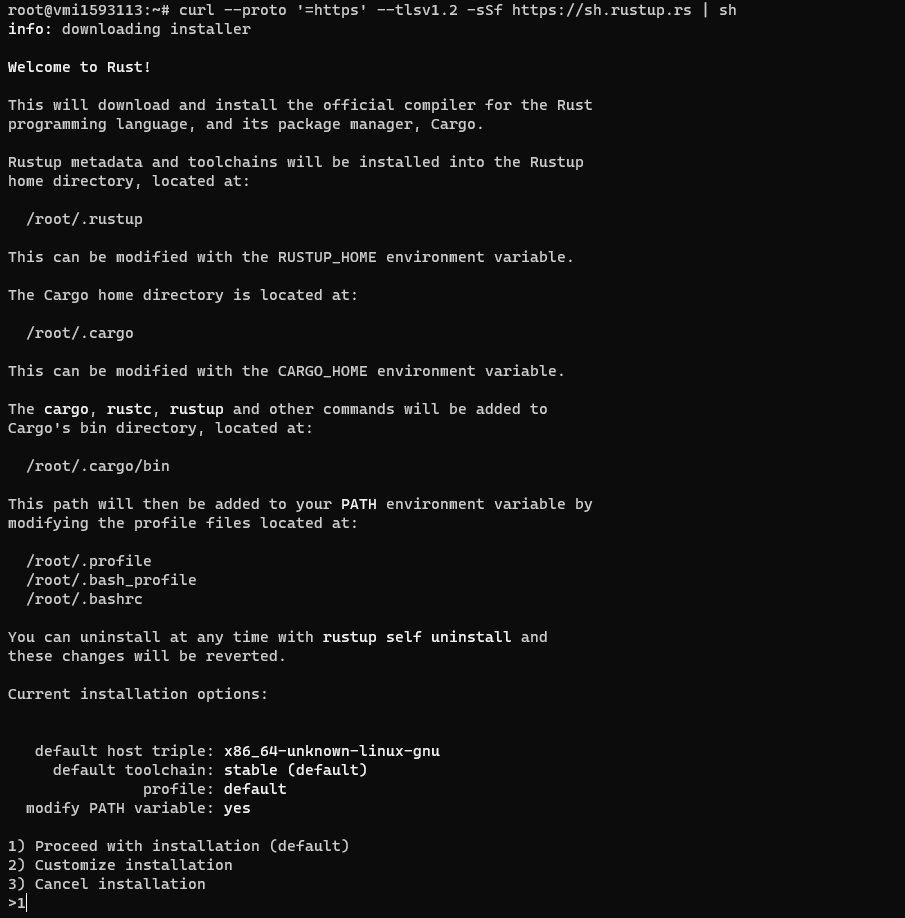
Enter “1” and press ENTER.
Refresh your VPS
source "$HOME/.cargo/env"

2- Aleo Installation
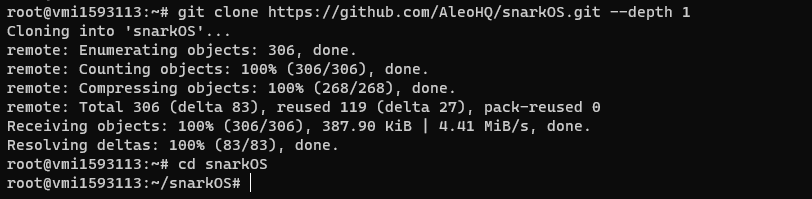
You will clone the Github Aleorepository:
git clone https://github.com/AleoHQ/snarkOS.git --depth 1
cd snarkOS
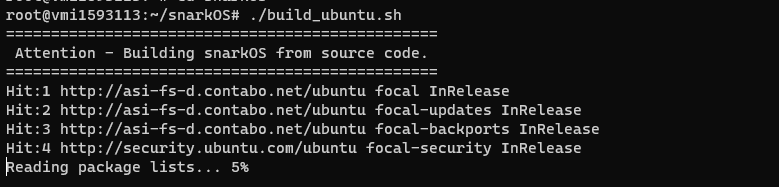
Initiate the installation of Aleo’s essential components:
./build_ubuntu.sh
Install Aleo:
cargo install --path .

3- Aleo Wallet Creation
You will use the Aleo command-line terminal to create your wallet:
snarkos account new

Be sure to carefully save the three generated lines, representing your private key, a preview of your key, and your wallet address.
4- Launching the Aleo Prover Node
You can now launch your Aleo Prover node.
Proceed to launch it from a Screen instance to run it in the background.
Create your Aleo Screen instance:
screen -S aleo

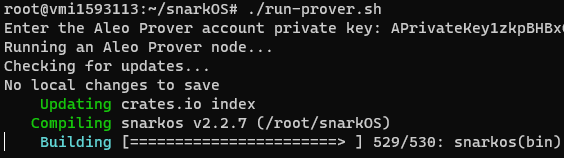
Then, start your node:
./run-prover.sh
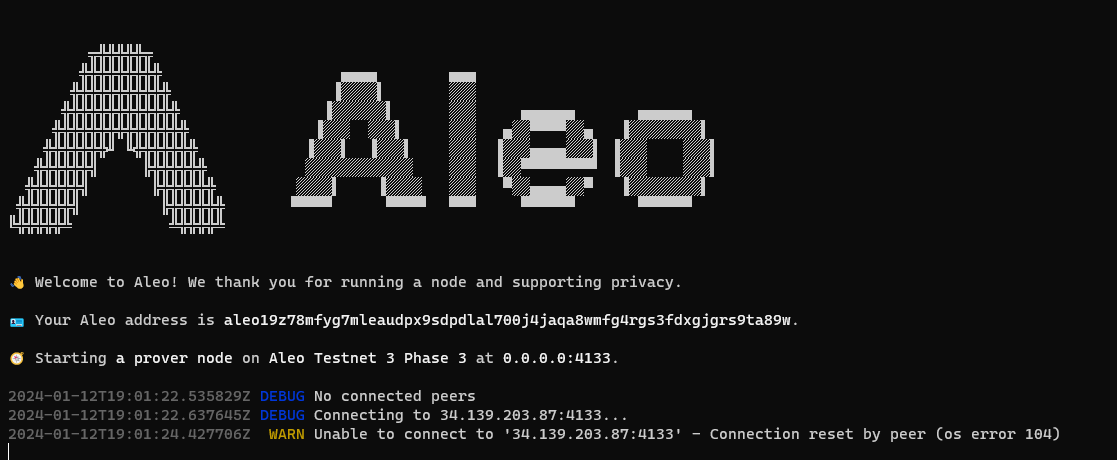
Congratulations, your Aleo Prover nodeis successfully launched!
To exit your Screen instance while keeping your node running, press simultaneously CTRL+A+D.
To return to the Screen instance and view the log of your node, enter the following command:
screen -r aleo
5- Interacting with Aleo Testnet
Armed with your private key, you can connect to the Aleo wallet to carry out interactions with the project.
Download the Wallet Leo
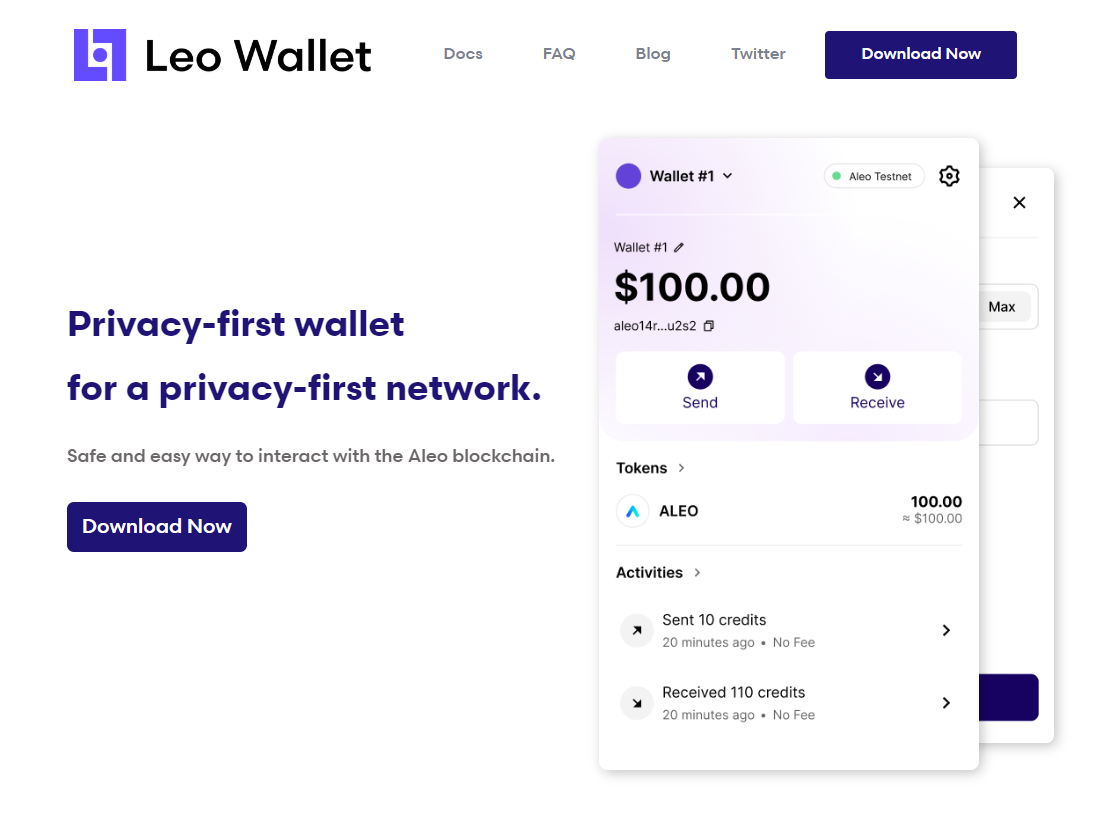
To import your private key, first generate a wallet.
In the application, click on ‘Account 1,’ and then on ‘Import Account.’ You will then have the option to enter your private key.
You will need testnet tokens to perform interactions on Aleo.
The most efficient method is to use the ‘Faucet’ function in your Leo walletapplication.
You will need to scan a QR Code and send an SMS to receive testnet tokens.

